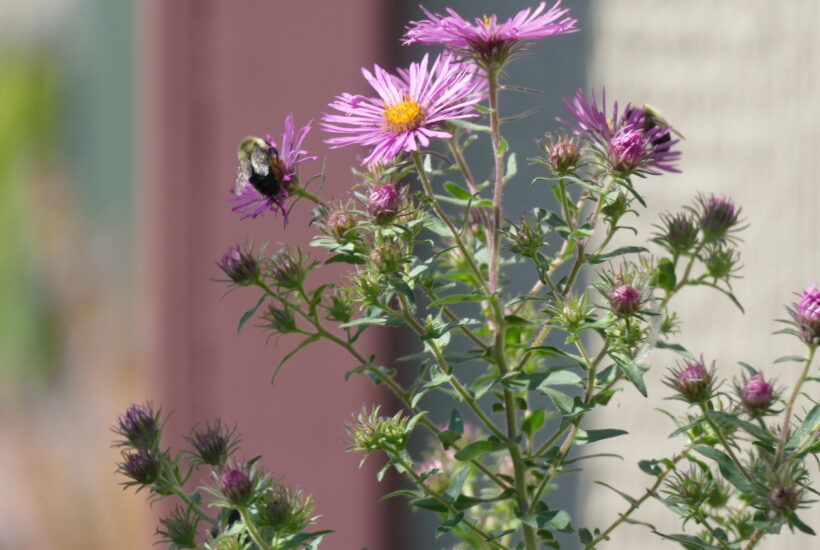
Feed on
Posts
Comments

Stop by the Hort Society booth for great deals on garden gear. (The garden gloves are HUGE sellers.)

I’ll be making my annual trek to the Minnesota State Fair to volunteer at the Minnesota State Horticultural Society booth next week, but I’m already figuring out a plan for visiting the fair. The state fair offers many temptations for gardeners — and not just the kind that are deep fried.

MSHS Garden, cared for by the St. Anthony Park Garden Club

Of course, the Horticulture Building, at the corner of Underwood and Judson, is the place to start. (Enter on Como Avenue for easy access.) Be sure to walk around the building and visit the gardens that are planted and tended for MSHS by the gardeners of the St. Anthony Park Garden Club. The gardens include two streams and a water feature and often are planted with native plants, which are usually at peak bloom during the fair. While this is my favorite garden at the fair, there are 32 organizations that Adopt-a-Garden at the fair. This brochure gives a good map and description of the gardens, which are restful places to stop and take a break. I often stop at the Minnesota Water Garden Society garden, which is near the Food Building.

Yes, they give an award for the largest zucchini!

Inside the hort building is the MSHS booth, which includes a retail store and a separate educational area (watch for Big Boy, the tomato). Just down the lane from the educational booth is the U of M Master Gardener’s question-and-answer booth, always a crowded spot and a great place to stop with questions about your gardens.  The building also includes winners in the State Fair big vegetable contest, the MSHS Plant Show displays, the apple displays (a healthy stopping point), and the new Dirt Stage, which will feature talks about gardening topics every day. Here’s a list of who’s speaking.

What are your favorite places at the State Fair?

Today's pickings: 16 cups

Raspberries may not be what bluegrass singers are thinking about while they play, but with raspberry season in full swing, it’s what I do. Pick, pick, pick, and grin! I’ve already had to reinforce the supports for my raspberries once this season, but even with the extra wires, the canes are so loaded with berries they are bent to the ground. (Note to self: Re-do raspberry support system in late fall.)

What to do with all those berries? We eat some on cereal or just out of hand; a few made their way into a Raspberry Cobbler; and many of them have been frozen on a tray and stowed in the freezer for those fall and winter days when fresh raspberries are not in the store, or just plain too pricey. For now, it’s time for pickin’ and grinnin’.

2.5 inches

That’s how much water was in my rain gauge this morning after a loud and dramatic thunderstorm around 3 a.m. in Northfield. I slept through the storm, but could tell something was up this morning when all my outdoor containers were overflowing with water and the ponds behind our house looked exceptionally high.

This seems to be part of a pattern this month of heat and humidity followed by storms. Earlier this week, my daughter and I were traveling home from the Twin Cities about 10 p.m. and were caught in the storm that dumped 5 inches of rain on downtown Minneapolis (and at least that much on some of the sections of I-35W we were on). We ended up stopping three times because the visibility was so limited in the torrential downpour.

More rain predicted for today, which we can hope will wring most of the water out of our incredibly humid weather.

Bruschetta with Garlic and Goat Cheese

With the tomatoes starting to come in, I made bruschetta and eggs for dinner last night. Bruschetta is toasted Italian bread with a topping, often including tomatoes and olive oil, that is typically served as an appetizer.  Last year, I made Bruschetta a la Julie and Julia after watching a movie about Julia Child and the blogger who cooked every recipe in Mastering the Art of French Cooking. (The bruschetta scene is positively mouth-watering.) Since then, I’ve seen bruschetta recipes with everything from bacon to peaches in them. The variation I tried last night is not quite traditional, but close

Bruschetta with Garlic and Goat Cheese

For the topping, cut three to four ripe tomatoes in smallish pieces, and mix with 3 tablespoons olive oil, 2 tablespoons chopped fresh basil, salt and pepper to taste. You can add a splash of vinegar, if you like things tart. Let this mixture sit out on the counter for a half hour or so to blend the flavors.

Toast slices of Italian bread. We used a whole grain version, but use whatever you like as long as it is sturdy. Rub each slice lightly with a clove of garlic. Spread with chevre or another goat cheese. Top with topping and enjoy!

This was very good, but whoo-boy, the garlic I used was very fresh from our local CSA farm and pungent. After dinner mints required.

This sign — spotted while riding my bike around town — made me laugh. Faced with an abundant harvest, who hasn’t wanted to give it all away?

Cucumbers are the crop du jour, and I know I’m not the only gardener with more cucumbers than they know what to do with. I’ve already made a big batch of bread-and-butter pickles, but there are more things to do with cucumbers than just preserve them. Here are two easy, delicious ways to use cukes with abandon.

Easy Marinated Cucumbers

This recipe works really well with cukes that are a little large. Peel a large cucumber, cut off the ends, then slice it in half length-wise. Using a spoon, scrape the seeds out of the cucumber. Slice each half into slices about 1/4 inch thick. Mix the slices in a dish with 2 tablespoons white vinegar, 1 tablespoon sugar, 1 teaspoon salt, and a big grind of black pepper. The salad tastes even better after it has rested in the refrigerator a couple of hours.

Cucumber Water

I got this recipe from one of Prevention magazine’s diet books. Even if you are not watching what you are eating, this is an incredibly flavorful summer drink, and it does calm your digestive system nicely. Peel and slice one cucumber into thin rounds. Wash and slice an organic lemon thinly. Mix the sliced fruits with 8 cups of water, 1 Tablespoon grated ginger, and a few mint leaves. Let it sit a few hours or overnight to blend the flavors.

Enjoy!

The Bees are Back

I built this simple bee house in the summer of 2008, and it has consistently attracted insects – despite an attack from a woodpecker last summer. Well, the bees are back. About two weeks ago, I noticed that some of the holes were being filled with mud, a sure sign that some pollinating insect was laying eggs in the box. The chambers are all filled now, with the exception of the woodpecker hole, and in a few weeks the bees will emerge and begin pollinating my raspberries and all of the other plants in the neighborhood.

Welcome back!

Easy Come, Easy Go

'Spitfire' nasturtiums, August 3

In an effort to clean out and edit some of the overgrown elements of my front garden, I cut back and moved a pot of  ‘Spitfire’ nasturtiums that I have been growing as part of the SeedGROW project. By the time I took them out,  my formerly lovely pot nasturtiums were sad, indeed, (there is apparently a reason these are nicknamed “nasties”) with a case of leafminers (thanks for the ID, Mr. Brown Thumb) and what might have been a wilt. Fortunately, the nasturtiums I planted in the ground are doing better.

The ones in the photo are from a group I planted with morning glories near a corner of the garage. It’s sunny in the morning, but shady most of the day. The nasturtiums seem to have been beat out for use of the support by the marigolds and so are mostly climbing along the ground. One of my longtime garden dreams is to create a floor of nastutriums similar to the one in Monet’s garden in France. That won’t be happening this year, but the nasties look pretty good (so far!) with the volunteer morning glories (good old, Grandpa Ott’s) and some ‘Profusion’ zinnias, which are doing the best they can in the tough clay soil near the garage.

“I’m growing Nasturtium “Spitfire” for the GROW project. Thanks, to Renee’s Garden for the seeds.”

Many gardeners used ornaments and containers for a touch of whimsy.

This past month, I have been really lucky to attend several garden tours. I started with tours around the Quad Cities in Iowa as part of a Garden Writers Association event, then hit the Northfield Garden Club tour, followed by my trip to Buffalo, N.Y. for three days of nonstop garden visits. In the past two weeks, I’ve been to three more tours. First, the North Oaks Garden Tour, followed by an MSHS event at the wonderful garden of Soni Forsman, water gardener extraordinaire, and this past weekend the Tangletown Garden Tour, which is one of the Twin Cities’ premier tours. Whew!

After seeing so many — and such diverse — gardens, the question becomes: what applies at home? The style of home and neighborhood is a big factor in what kind of garden you grow. I don’t have a small, urban, fenced-in yard where you can hang a mirror on the wall to make things look bigger, like they do in Buffalo, and I don’t garden on several acres where big expanses of lawn are part of the aesthetic.  Still, the gardens I toured shared some characteristics that can be applied in any setting.

Dense shrubbery, nectar plants, water sources and feeders were beautifully combined in this wildlife garden.

They had a theme. Maybe theme is the wrong word. It’s more like a focus or a vision. One of the gardens I loved in North Oaks was a certified wildlife refuge and you could tell that the goal of being a home to birds — there were dozens, even in midday — was a guiding principle in the gardener’s mind. A garden we toured in Buffalo reflected the owners’ love of hosting parties with wild, joyful plantings and a covered cantina-like area in the back corner. One step in that garden and you felt like whooping it up.  I’ve written earlier about the idea of naming a garden, but having a theme is what those names reflect. And, themes must come from the gardener’s own aesthetic and sensibility.

Containers provide texture and a pop of color.

They used containers well. Containers can nestle a seating area, provide a greeting at the front porch, or brighten up empty or dull spots in the garden. For a strong impact, use larger containers and keep the plants looking healthy with regular fertilizing (every two weeks, according to one of the gardeners), and plenty of water. Don’t be afraid to change containers with the season. They make great seasonal accents.

Lush, yes, but each plant gets some breathing room.

They were well edited. Many of the gardens I visited were heavily planted. But, with one exception, I didn’t think any of them were “over-stuffed.” Sometimes the key to a well-designed garden is not so much what you put in, but what you take out. After the tours, I dug into one of my front beds and did some much needed editing — I pulled a tarp full of overgrown plants out of it, giving the remaining plants (and anyone who looks at the bed) room to breath.

I have at least one more tour to attend this year. What is the best tip you’ve taken away from garden tours?

Caterpillars Pig Out

Caterpillars on butterfly weed Saturday afternoon.

Last fall, Northern Gardener published an article on ways to attract butterflies and hummingbirds to your garden. In it, Tom and Donna Krischan recommended a plant called bloodflower milkweed  (Asclepias curassavica). The plant is known as a terrific food source for Monarch caterpillars.

I ordered some seeds, then promptly forgot why. I thought this was just a fancy butterfly weed (Asclepias tuberosa) which is known for its bright orange flowers that attract butterflies. So, thinking it would be fun to have butterflies on the porch, I planted some of the seedlings in one of my pots. Imagine my surprise this past weekend when I went on the porch and discovered a horde of caterpillars munching away.  Within about 12 hours, they had consumed the entire plant, except for the stalks.  (See the photo below for the current appearance.)

I’m not sure where all these caterpillars came from, and according to Tom’s article, they are now hanging on a branch somewhere nearby waiting to emerge as butterflies. I can hardly wait until they come back!


Pickle Time

The Finished Product

Right now, the squash and cucumbers are duking it out in my back garden. I’m afraid that, without intervention, the squash — an allegedly “compact” butternut variety  — may win. In the meantime, the cukes are growing like crazy, so I’m making pickles.

While many people enjoy dill pickles, I grew up on  sweet bread-and-butter pickles made from Grandma Lahr’s recipe. Pickling, like any preserving project, is all about the process. That said, the number of methods and recipes I located for bread-and-butter pickles is remarkable. You can also watch lots of people making pickles over on youtube. Here’s one with a very similar recipe and process to the one I used.

My grandmother’s recipe does not call for a boiling-water bath to guarantee safety, so I contacted the Minnesota-Iowa food preservation line just to check whether that was necessary. The kind lady who answered the phone said grandma’s method, while common in her day (and I should note grandma was a public health nurse at one time and a real stickler for cleanliness and food safety), is not approved now because of the danger of food poisoning. Here’s an approved recipe for b-and-b pickles that are canned. If you are willing to refrigerate your pickles, read on:

As with any recipe, read through the whole thing before you start. Also, keep your work area scrupulously clean to prevent any stray bacteria from getting into the pickles.

Grandma Lahr’s Bread and Butter Pickles

Step 1: The Veggies

4 quarts (16 cups) thinly sliced cucumbers

1 white onion, thinly sliced

1 green pepper, thinly sliced (optional)

1 red pepper, thinly sliced (optional)

1/3 cup salt (I used Kosher)

Ice (about 1 tray)

Wash your cucumbers thoroughly, then slice your vegetables about 1/4 inch thin and layer them in bowl, sprinkling each layer with some of the salt and a bit of ice. When it is all prepped, cover the bowl with plastic wrap and weigh it down slightly. (I put a couple of Pyrex cups on top for weight.) Let it sit 3 hours. When the time is up, drain the icy, salt water off of the vegetables and put the vegetables in one large kettle or two smaller ones.

Before you start the brine, wash and sterilize (usually by immersing in the boiling water for several minutes) 8 pint canning jars. Wash and set in a separate pan or bowl 8 canning lids and 8 rings. Pour boiling water over the lids and rings to sterilize them as well. Leave the rings and lids in the hot water.

Step 2: The Brine

3 cups distilled white vinegar

5 cups sugar

3 cloves garlic (optional)

1-1/2 teaspoon tumeric

1-1/2 teaspoon celery seed

2 Tablespoons mustard seed

Mix this together, heat it to a boil, then add the vegetables. Put the heat on again and bring it to a boil. Once it hits a decent boil, turn off the heat.

Step 3: Canning

Carefully ladle the hot pickles into the hot jars to within 1/2 inch of the rim, making sure the brine covers all the veggies. Poke a knife or spatula in each jar to remove air bubbles. Wipe the jar rims with a clean cloth or paper towel, then attach the sterile lids and rings. Set them on a counter to cool. Most of the jars (5 out of 6 in my case) will seal. Store in the refrigerator for up to three months.

These pickles are incredible in tuna salad or alongside any meat sandwich.


Older Posts »