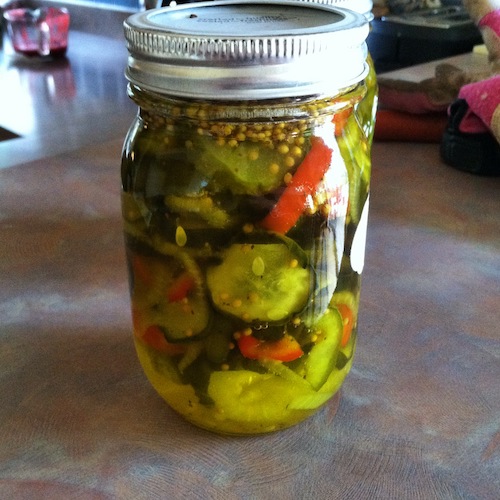
Right now, the squash and cucumbers are duking it out in my back garden. I’m afraid that, without intervention, the squash — an allegedly “compact” butternut variety — may win. In the meantime, the cukes are growing like crazy, so I’m making pickles.
While many people enjoy dill pickles, I grew up on sweet bread-and-butter pickles made from Grandma Lahr’s recipe. Pickling, like any preserving project, is all about the process. That said, the number of methods and recipes I located for bread-and-butter pickles is remarkable. You can also watch lots of people making pickles over on youtube. Here’s one with a very similar recipe and process to the one I used.
My grandmother’s recipe does not call for a boiling-water bath to guarantee safety, so I contacted the Minnesota-Iowa food preservation line just to check whether that was necessary. The kind lady who answered the phone said grandma’s method, while common in her day (and I should note grandma was a public health nurse at one time and a real stickler for cleanliness and food safety), is not approved now because of the danger of food poisoning. Here’s an approved recipe for b-and-b pickles that are canned. If you are willing to refrigerate your pickles, read on:
As with any recipe, read through the whole thing before you start. Also, keep your work area scrupulously clean to prevent any stray bacteria from getting into the pickles.
Grandma Lahr’s Bread and Butter Pickles
Step 1: The Veggies
4 quarts (16 cups) thinly sliced cucumbers
1 white onion, thinly sliced
1 green pepper, thinly sliced (optional)
1 red pepper, thinly sliced (optional)
1/3 cup salt (I used Kosher)
Ice (about 1 tray)
Wash your cucumbers thoroughly, then slice your vegetables about 1/4 inch thin and layer them in bowl, sprinkling each layer with some of the salt and a bit of ice. When it is all prepped, cover the bowl with plastic wrap and weigh it down slightly. (I put a couple of Pyrex cups on top for weight.) Let it sit 3 hours. When the time is up, drain the icy, salt water off of the vegetables and put the vegetables in one large kettle or two smaller ones.
Before you start the brine, wash and sterilize (usually by immersing in the boiling water for several minutes) 8 pint canning jars. Wash and set in a separate pan or bowl 8 canning lids and 8 rings. Pour boiling water over the lids and rings to sterilize them as well. Leave the rings and lids in the hot water.
Step 2: The Brine
3 cups distilled white vinegar
5 cups sugar
3 cloves garlic (optional)
1-1/2 teaspoon tumeric
1-1/2 teaspoon celery seed
2 Tablespoons mustard seed
Mix this together, heat it to a boil, then add the vegetables. Put the heat on again and bring it to a boil. Once it hits a decent boil, turn off the heat.
Step 3: Canning
Carefully ladle the hot pickles into the hot jars to within 1/2 inch of the rim, making sure the brine covers all the veggies. Poke a knife or spatula in each jar to remove air bubbles. Wipe the jar rims with a clean cloth or paper towel, then attach the sterile lids and rings. Set them on a counter to cool. Most of the jars (5 out of 6 in my case) will seal. Store in the refrigerator for up to three months.
These pickles are incredible in tuna salad or alongside any meat sandwich.

I did pickles for the first time too. I’m totally addicted to making my own now.
Mary, these sound delicious! I’ll have to make a batch of them this year.
My husband is a sour dill pickle guy, but I love bread and butter pickles. My aunt made great pickles. I might have to try again this year – on the other hand we have a wonderful local pickle company – check out http://www.realpickles.com. Dan Rosenberg uses only brine, no vinegar, in his pickles of many varieties.