With the basics of container design in mind (see previous post), I set up shop in the mudroom and gathered the equipment and materials for making a holiday container. These included: the pot filled to within 2 inches of the top with compost, four kinds of greens, three decorative things that are pretty and not green (in my case, red-twig dogwood branches, fake poinsettia flowers, and fake red berries), and a by-pass pruner for cutting branches. I donned my garden gloves and went to work.
Use several types of greens to give your pot texture and fullness.
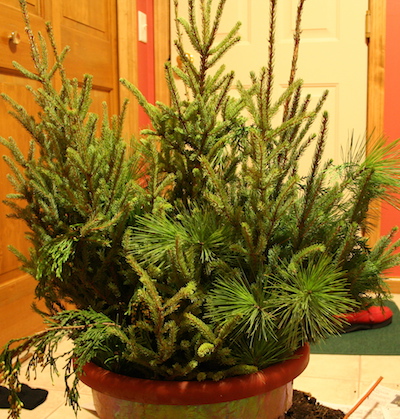
For complete instructions on how to make a holiday container, see the post I did last year after observing Kathy Oss of Squire House Gardens design a wonderful container. Basically, you start with the greens, cutting each branch at an angle before shoving it in the dirt. Since I had a pack of spruce tips, I started with those and created a full base. Then, I added in the other greens: cedar and two kinds of pine. The different greens give the pot texture and color contrast.
Once the pot looks full enough with greens, it’s time to add the other elements. Since my container has a definite front side, I put most of the red-twig dogwoods in the middle back to give it some height, then I added in the red flowers and berries. At left is my finished product, which didn’t look quite right to me, so I took a break.
When the 16-year-old got home from choir practice, she took one look at the pot, and sighed, “Mom, you need a focal point.” Ah-ha! So, we did a little re-arranging of the flowers and added a few more of the berries, and things started to come together. One thing I like about my pot is the texture of the cedar, the spruce, the pine, and the berries.
I set the pot out on the front porch and watered it well. The water froze last night (temperatures were in the teens here), so the design is frozen in place for now.
Great to have the step by step directions, and I love the red pot!